Select to expand quoteforceten said..
Melih
The effort to make a sail must be enormous, I have to applaud your fine effort. I would be interested to hear how she sails.
Nice one
Dear Forceten,
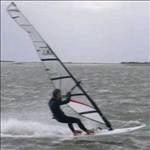
Thanks for your interest. In summer I will test it in Aegean Coast. Select to expand quoteracerX said..melih said..racerX said..melih said..racerX said..
Impressive!
How did you copy the sail, did you pull it apart? How did you work out how much seam shaping to use and how did you work out the luff curve?
I think I will stick to second hand ![]()
Btw why not use the plastic hitch on the boom, I get a two to one pulley just using my wave boom, without using a pulley.
Dear racer x,
It is very easy to copy a sail. First I laid the sail on the large wood table. Then I drew the frame with pen on the table. I divided my sail to 5 window parts.( in theory not breaking into pieces the original sail). 5 battens means 5 windows. Later I put the monofilm on the table and copied with pen. I copied the luff curve with same technique.
Total material is:
7 sqm 150 micron monofilm.
6 sqm white and colorful dacron fabric
6 pack of double sided tape
4x chrom nickel collet
original 2x pulley
5 m polyester strap
1x mast stopper
As I understand you, plastic hitch is not enough for me.
If you are interested in homemade sails I can mail you detailed photographs. Bye,
Melih...
That's was the point I was getting at. I.e how did you copy the seam shaping if any. I guess the original did not have much to begin with. I am not sure pulling apart the panel, would have allowed you to measure the seam shaping in any case. But was curious about any insight. Was also curious if you used a template for the luff curve.
Dear racer X,
I am still thinking how to explain the easiest way copying the sail. Bye,
I understood using panels as template, what I was curious about is did you use any seam shaping, and if so how did you determine how much and where to use it.
Perhaps being a wave or free style sail it not appropriate.
Not a criticism, btw my sail DIY extends to self adhesive sail repair tape. But I do understand the theory![]()
Dear racer X,
I think seam shape is very important for you. I don't do anything for seam shape I just copy it %100. I copy the curve %100 what the original is. Now I am going to explain to you my style. First of all I lay the original sail on the large wood table after I put my finger on the mast sleeve to find the end of the monofilm. You can easly feel that thickness with your finger. Just put a mark on the mast sleeve with a pencil. And follow the same procedure every 30 cm. Put mark every 30 cm. When you reach end of the mast sleeve put your last mark with pencil . Original sail's luff is 414 cm and you marked the sail every 30 cm now you have 13 signs. Take your longest batten and combine all the signs. Give a nice parobolic curve. This is it. Your seam shape is ready. I drew a few plans for you.
Bye. Melih.


Select to expand quotemelih said..racerX said..
Impressive!
How did you copy the sail, did you pull it apart? How did you work out how much seam shaping to use and how did you work out the luff curve?
I think I will stick to second hand ![]()
Btw why not use the plastic hitch on the boom, I get a two to one pulley just using my wave boom, without using a pulley.
Dear racer x,
It is very easy to copy a sail. First I laid the sail on the large wood table. Then I drew the frame with pen on the table. I divided my sail to 5 window parts.( in theory not breaking into pieces the original sail). 5 battens means 5 windows. Later I put the monofilm on the table and copied with pen. I copied the luff curve with same technique.
Total material is:
7 sqm 150 micron monofilm.
6 sqm white and colorful dacron fabric
6 pack of double sided tape
4x chrom nickel collet
original 2x pulley
5 m polyester strap
1x mast stopper
As I understand you, plastic hitch is not enough for me.
If you are interested in homemade sails I can mail you detailed photographs. Bye,
Melih...
Good effort on the sail profile, ( the outer curve of the sail ) but it does look like you didn't put any seam shaping in the power area, i.e. around the boom area, this is the hard part of any sail as the outer area then shifts. Seam shaping would give it some power and a bit of stability.......Good effort though 1000 marks from me.....
Select to expand quoteMadge said..melih said..racerX said..
Impressive!
How did you copy the sail, did you pull it apart? How did you work out how much seam shaping to use and how did you work out the luff curve?
I think I will stick to second hand ![]()
Btw why not use the plastic hitch on the boom, I get a two to one pulley just using my wave boom, without using a pulley.
Dear racer x,
It is very easy to copy a sail. First I laid the sail on the large wood table. Then I drew the frame with pen on the table. I divided my sail to 5 window parts.( in theory not breaking into pieces the original sail). 5 battens means 5 windows. Later I put the monofilm on the table and copied with pen. I copied the luff curve with same technique.
Total material is:
7 sqm 150 micron monofilm.
6 sqm white and colorful dacron fabric
6 pack of double sided tape
4x chrom nickel collet
original 2x pulley
5 m polyester strap
1x mast stopper
As I understand you, plastic hitch is not enough for me.
If you are interested in homemade sails I can mail you detailed photographs. Bye,
Melih...
Good effort on the sail profile, ( the outer curve of the sail ) but it does look like you didn't put any seam shaping in the power area, i.e. around the boom area, this is the hard part of any sail as the outer area then shifts. Seam shaping would give it some power and a bit of stability.......Good effort though 1000 marks from me.....
Also the use of a zig zag or triple stitch on the seams would help, most sails are made this way so they can both breath a little and so different stretching materials that are joined can stretch and not just rip or shear apart.
Select to expand quoteMadge said..Madge said..melih said..racerX said..
Impressive!
How did you copy the sail, did you pull it apart? How did you work out how much seam shaping to use and how did you work out the luff curve?
I think I will stick to second hand ![]()
Btw why not use the plastic hitch on the boom, I get a two to one pulley just using my wave boom, without using a pulley.
Dear racer x,
It is very easy to copy a sail. First I laid the sail on the large wood table. Then I drew the frame with pen on the table. I divided my sail to 5 window parts.( in theory not breaking into pieces the original sail). 5 battens means 5 windows. Later I put the monofilm on the table and copied with pen. I copied the luff curve with same technique.
Total material is:
7 sqm 150 micron monofilm.
6 sqm white and colorful dacron fabric
6 pack of double sided tape
4x chrom nickel collet
original 2x pulley
5 m polyester strap
1x mast stopper
As I understand you, plastic hitch is not enough for me.
If you are interested in homemade sails I can mail you detailed photographs. Bye,
Melih...
Good effort on the sail profile, ( the outer curve of the sail ) but it does look like you didn't put any seam shaping in the power area, i.e. around the boom area, this is the hard part of any sail as the outer area then shifts. Seam shaping would give it some power and a bit of stability.......Good effort though 1000 marks from me.....
Also the use of a zig zag or triple stitch on the seams would help, most sails are made this way so they can both breath a little and so different stretching materials that are joined can stretch and not just rip or shear apart.
Dear Madge,
Thanks for your comment. I think you are a sail maker. I saw your photographs, I copied NS 4.7 Curve I didn't change the original shape. I didn't put anything extra. What do you do for seam shaping? Can you explain it for me? Bye..
Select to expand quotemelih said..Madge said..Madge said..melih said..racerX said..
Impressive!
How did you copy the sail, did you pull it apart? How did you work out how much seam shaping to use and how did you work out the luff curve?
I think I will stick to second hand ![]()
Btw why not use the plastic hitch on the boom, I get a two to one pulley just using my wave boom, without using a pulley.
Dear racer x,
It is very easy to copy a sail. First I laid the sail on the large wood table. Then I drew the frame with pen on the table. I divided my sail to 5 window parts.( in theory not breaking into pieces the original sail). 5 battens means 5 windows. Later I put the monofilm on the table and copied with pen. I copied the luff curve with same technique.
Total material is:
7 sqm 150 micron monofilm.
6 sqm white and colorful dacron fabric
6 pack of double sided tape
4x chrom nickel collet
original 2x pulley
5 m polyester strap
1x mast stopper
As I understand you, plastic hitch is not enough for me.
If you are interested in homemade sails I can mail you detailed photographs. Bye,
Melih...
Good effort on the sail profile, ( the outer curve of the sail ) but it does look like you didn't put any seam shaping in the power area, i.e. around the boom area, this is the hard part of any sail as the outer area then shifts. Seam shaping would give it some power and a bit of stability.......Good effort though 1000 marks from me.....
Also the use of a zig zag or triple stitch on the seams would help, most sails are made this way so they can both breath a little and so different stretching materials that are joined can stretch and not just rip or shear apart.
Dear Madge,
Thanks for your comment. I think you are a sail maker. I saw your photographs, I copied NS 4.7 Curve I didn't change the original shape. I didn't put anything extra. What do you do for seam shaping? Can you explain it for me? Bye..
yeah I've made sails for Pryde and Norths etc. When I say seam shaping it basically means the shape, usually positive in the lower section of the sail. This is where you stick one seam with a positive curve to a flat seam, this then creates a 3d shape. The outside edge or the profile is the luff curve and the leech shape, although now most sails have a negative seam in the top section to produce leech twist.
The seam shaping is what creates the wing shaped curve and the negative produces the twist although you can also produce twist from luff curve.
Your sail looks great but with just a few changes could have better lower end power due to shape which would also make it a bit more stable. Keep up the good work and make more, the only way to get better is by trying more.
Good luck....
Looks good.
I ( being a past windsurfer sailmaker and still repairer) would suggest if anyone does give it a go then..
Hit your mate up, or dig out a old modern sail and pull it apart.
You need a copy of the seam shaping to get the right draft in your sail.
The front luff panel might have seam shaping, the lowers seams under the battens and the foot panel.
Also If you copy a luff curve make sure it is for correct mast, i.e constant, flex , hard top etc.
Just go to the beach on the big day , hang around and wait for the guy to come in with sail trashed![]()
![]()
Select to expand quotereally cool ...........just need to re arrange the lounge a bit better ![]()
Select to expand quotegeared4knots said..
...dig out a old modern sail and pull it apart.
The best way to start a design, is to use paper and sticky-tape... people have been making clothes from patterns for thousands of years, it would be silly to not use similar tools. Initially doesn't have to be full-sized, just make it scaled down.
Since paper has some inherent stiffness, after a few attempts you should start to see a 3-dimensional shape being formed.... and not just a flat-shape sitting on the table.
Select to expand quotedidimmandalya said..Magic Ride said..
Start the topic!!!!!!!![]()
any female windsurfer on Seabreeze ![]()
![]()
![]()
![]() ?????*
?????*
A few of us..![]() Just don't ask me about sewing..
Just don't ask me about sewing..![]()
![]()
Select to expand quotemathew said..geared4knots said..
...dig out a old modern sail and pull it apart.
The best way to start a design, is to use paper and sticky-tape... people have been making clothes from patterns for thousands of years, it would be silly to not use similar tools. Initially doesn't have to be full-sized, just make it scaled down.
Since paper has some inherent stiffness, after a few attempts you should start to see a 3-dimensional shape being formed.... and not just a flat-shape sitting on the table.
Dear Mathew,
Thanks, I agree with you.
Select to expand quoteMadge said..
although now most sails have a negative seam in the top section to produce leech twist.
The seam shaping is what creates the wing shaped curve and the negative produces the twist although you can also produce twist from luff curve.
I'm very interested in your description Madge. But as a novice to sail modification, I'm lost in what you mention. What area in the upper part of the sail is the negative curve introduced?
I'm very impressed with your build Melih.![]()
![]()
Hello Chook2,
The upper part of the sail in the leech area has twist, this helps accelerate the wind over the leech of the sail and reduces turbulance and also helps it not pull so hard in the gusts.
When making a sail this can be put into the sail in two way. The first is to straighten the luff curve at the head so the area in a straight line from the head to the clew is shortened and as the sail cloth has no where to go it simply falls away.
The second way is to actually cut negative into the seams that join together, this then falls away or you can use a bit of both.
The foot area of a sail usually has positive shaping and therefore bulges out and creates a foil or wing shape.
The best thing to actually do is make a little sail.
I am thinking of making a little kit to show people how to actually shape sails, they'll just stick together.
Hope this is of some help....
Madge.
Hey Melih,
I just realised you dont have any support for the upper leech in your sketch.
Usually there is a batten tip at the upper leach corner. I'm sure the Curve has one there.
Thanks Madge, I really appreciate your time here.
So the negative seam area would be in line from the head to clew so it can twist off (just as the windsurfer sails do really well now)?
How far up the sail would you start to introduce this negative, just over 1/2 up from the tack (do it more gradually), or more towards/past the 3/4 mark?
Cheers.
Select to expand quoteNotWal said..
Hey Melih,
I just realised you dont have any support for the upper leech in your sketch.
Usually there is a batten tip at the upper leach corner. I'm sure the Curve has one there.
Dear NotWal,
Probably you are right. Later I Will check Th? NS Curve sail. After Controlling Th? sail I Will inform you. Thanks for your interest.