A few more images before I go on hols, been busy getting ready.
These ones are mosly of the hand hold, I have been editing for over an hour so far.
I'll post the EVA deckgrip when we get back the week after next.
This first image is of the centre of balance point found and marked on the deck.
I balance the board on my hand and mark the spot.

The hole making tool a router. you can use a drill to make the hole and just join up the drill holes and sand off the points. Put some tape around the drill bit to act as a depth guage

the hole marked out.

The hole routed out. this is where you can use a drill. Also test the balance of the hole if it is not quite right add some more hole

the edges have been rounded to about 4mm round. I use the stringer for support, this is where my hand grips. It is also on the centre line and acts as a great indicator for where to stand. The hole is ready for glassing

The glass cut to size and arranged in their correct position around the job. the rule is for sizing for you.

wet out the job with resin before you lay the glass

The first pieces of glass are in place

some more glass in place

This image shows the finished lamination and the unsanded glass

the presanded glas smoothed with coarse paper before filler coating with a waxed resin or sanding resin. lamination or glassing resin is unwaxed.

finished hand hold filler coated, you can be as smooth as you want here. you can sand the job again and finish coat it for a real professional job if you want.

These images are fo the finished 8'6" x 29" x 137ltr board

Bottom mage of the rocker profile

bottom planshape

The deck finished planshape image. This shows the narrower nose

This a teaser,it is a closeup of theEVA deck grip I made for this board.
I will post the how to images when I get back from hols

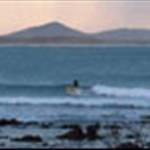
I have surfed this board already, out the point insmall 3 footers and off the beach in about the same size, it goes better than the yellow one as it is a bit narrower and has more float for stability and is really fast even with all that tail rocker.
Rod