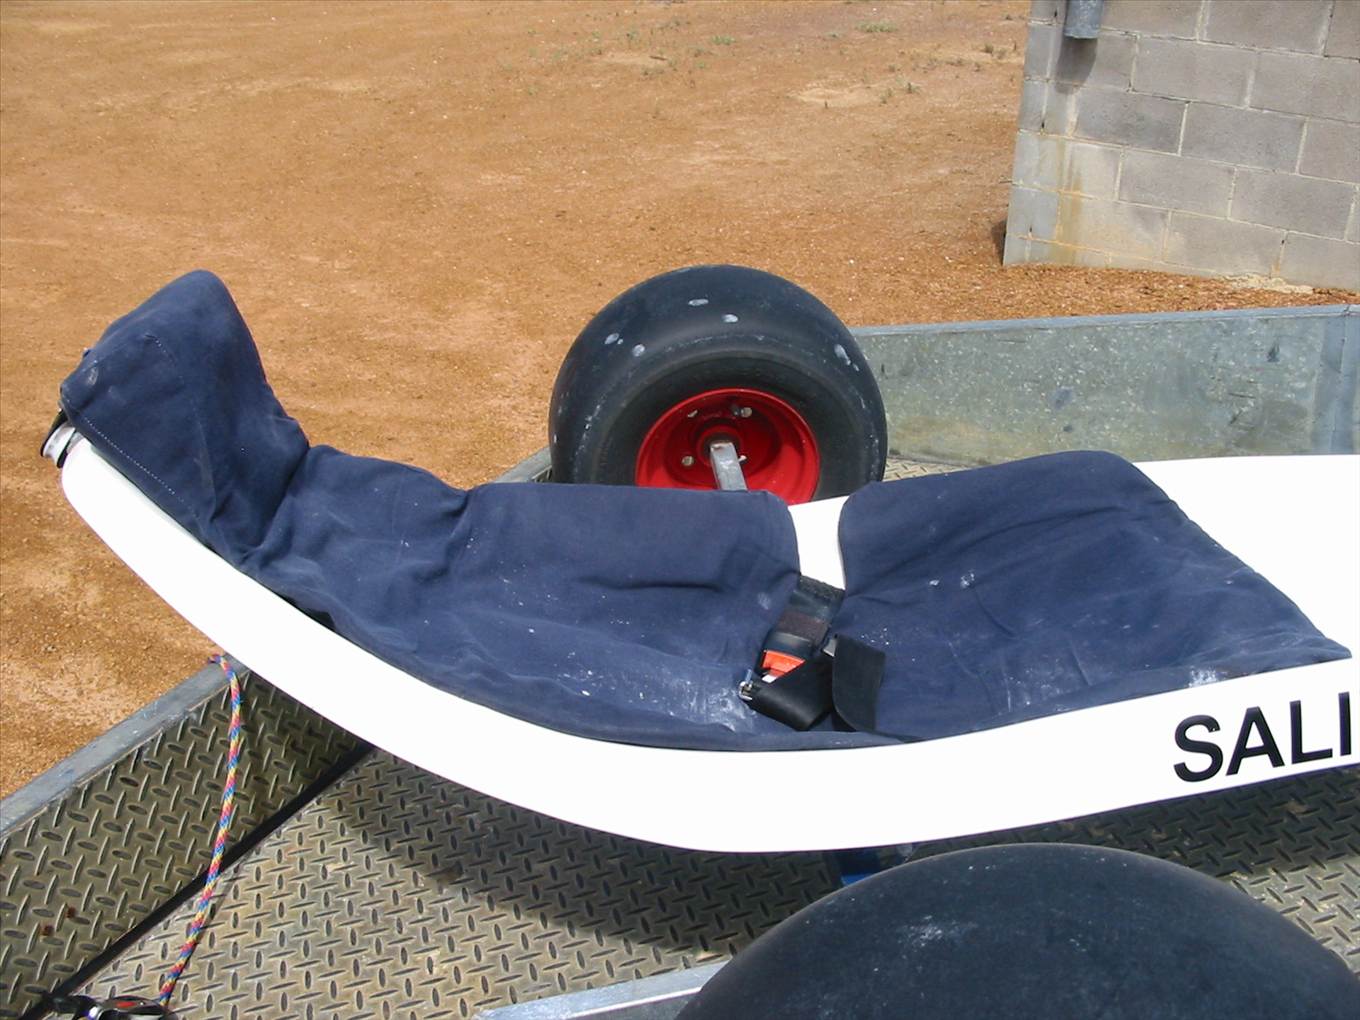
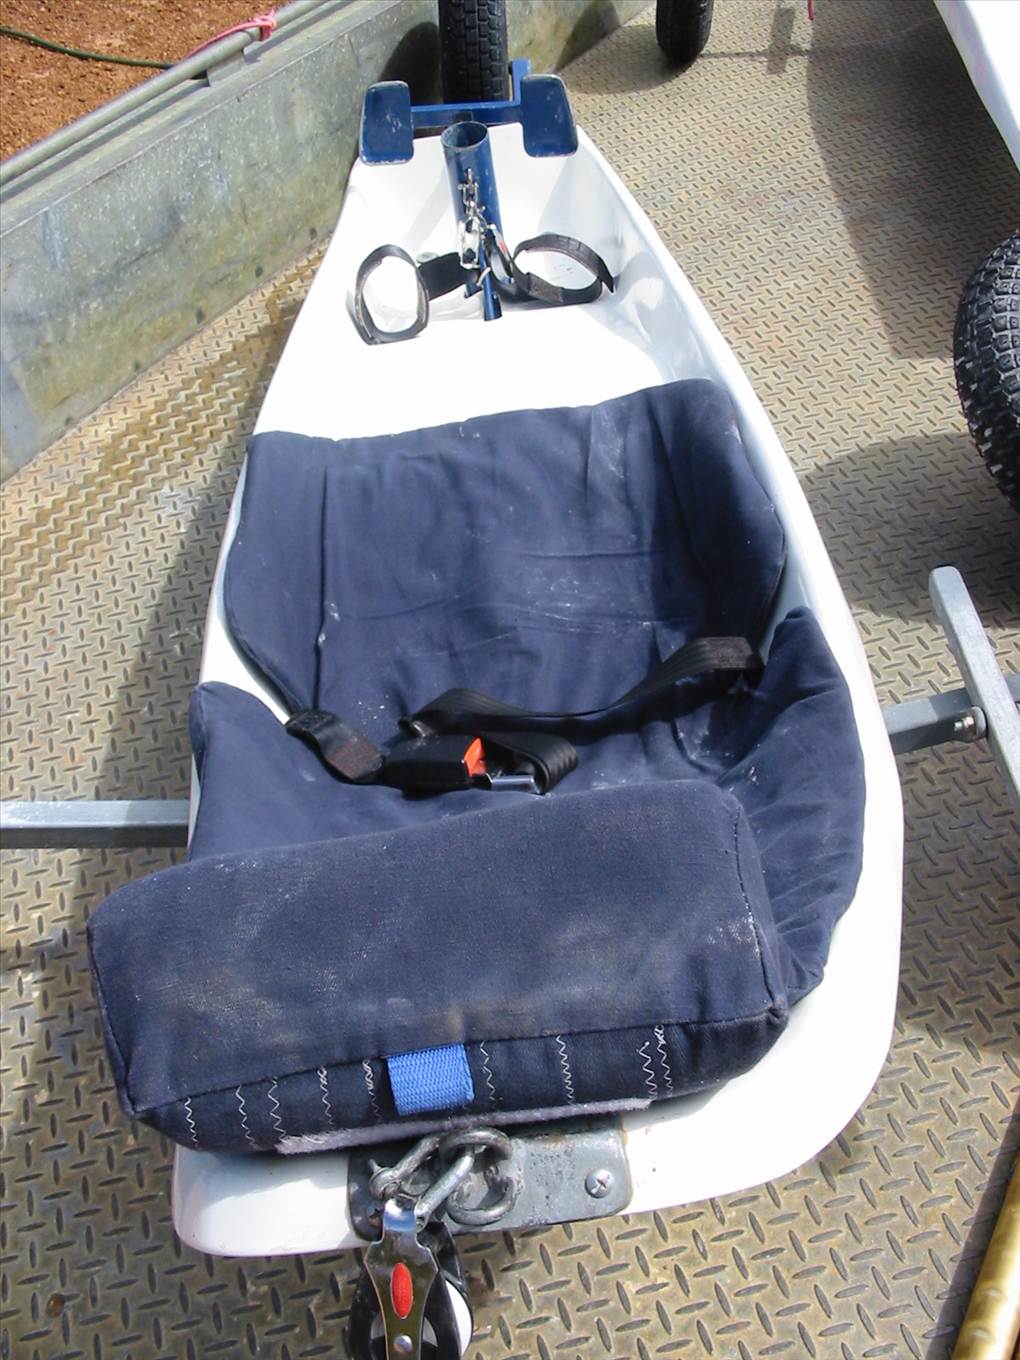
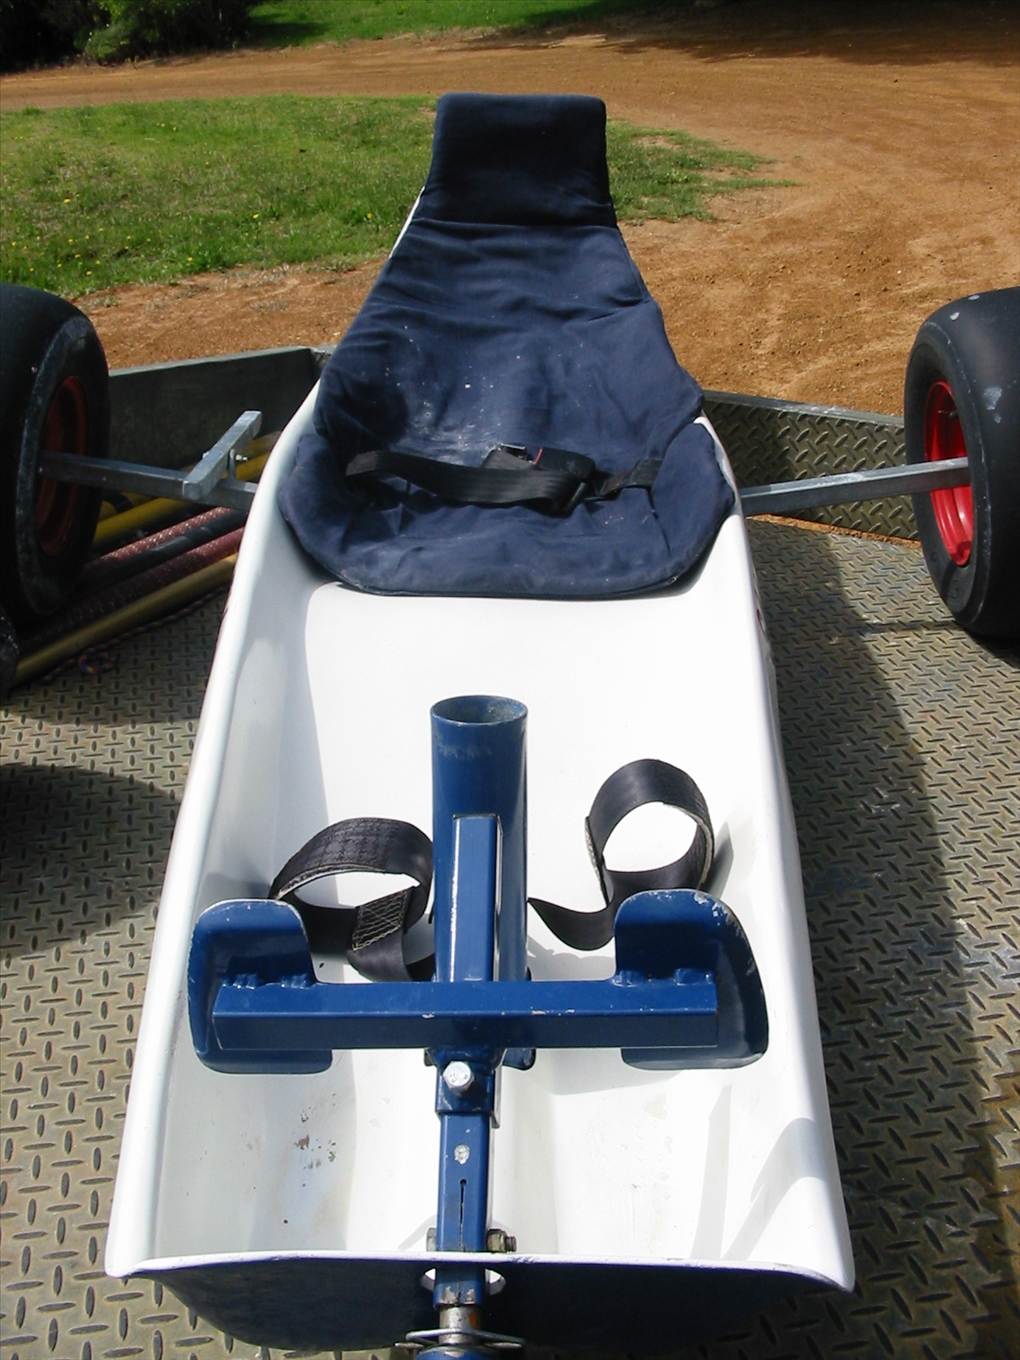
Well being older I favour a few creature comforts, so decided after making my first few yachts with wooden seats that they needed a pep up.
I've knocked up six cushions now. I have settled on this assembly for long hours in the yacht with great comfort.
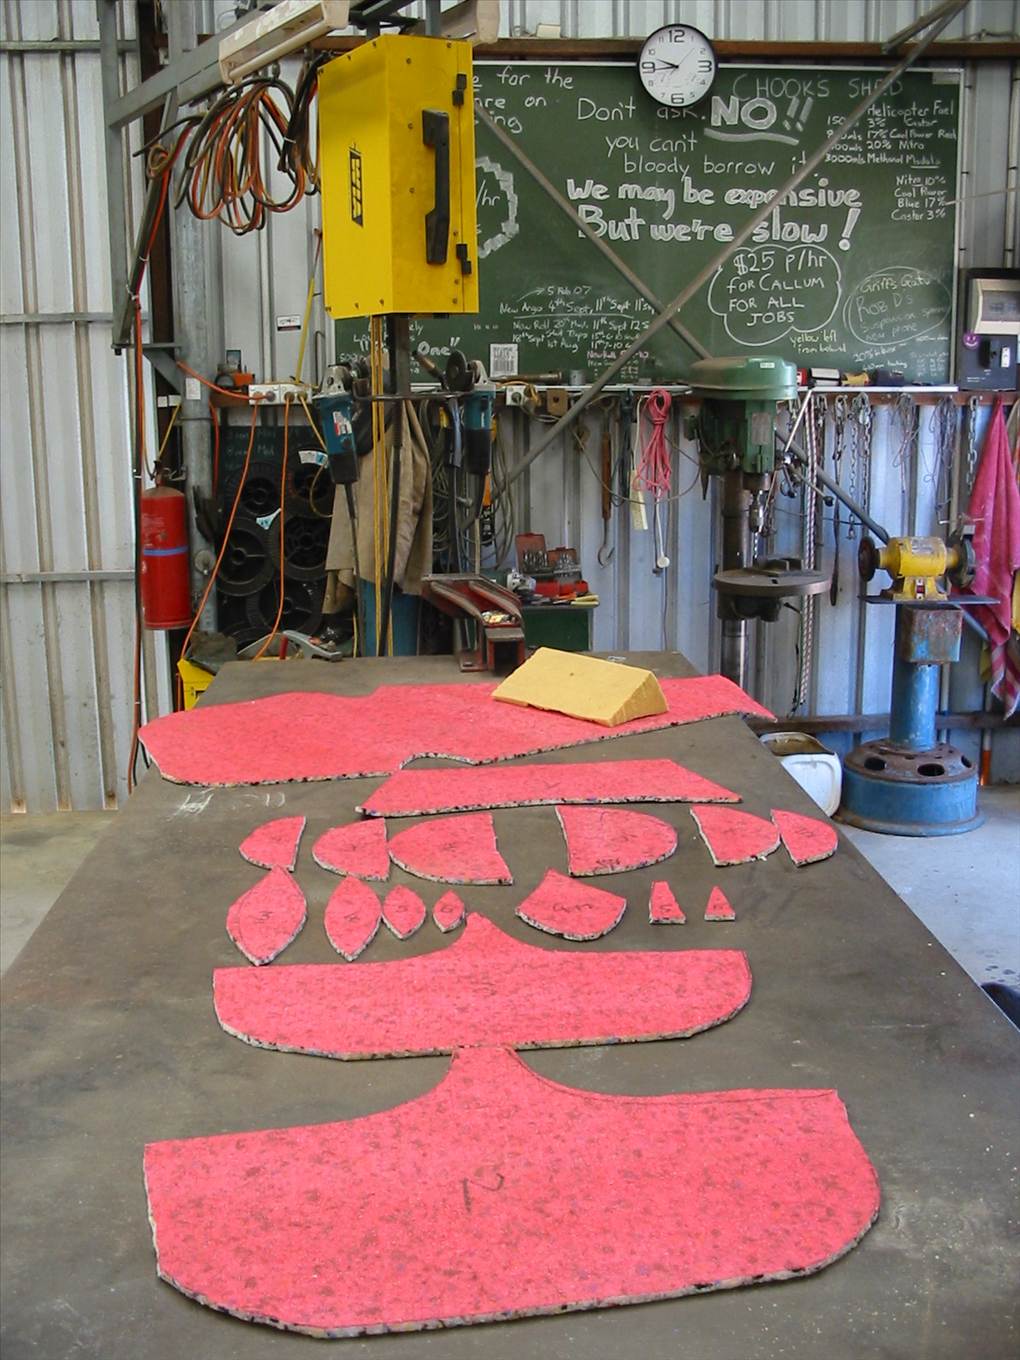
I have used old carpet underlay as it's cheap (scabbed from the local skip bin) it's water repellent, anti-fungal/mould proof and it's pretty light. It also has a reinforcing mesh attached to the sealed surface, to retain its integrity. The best of all is the foam used in the manufacture of this underlay is recycled foam.

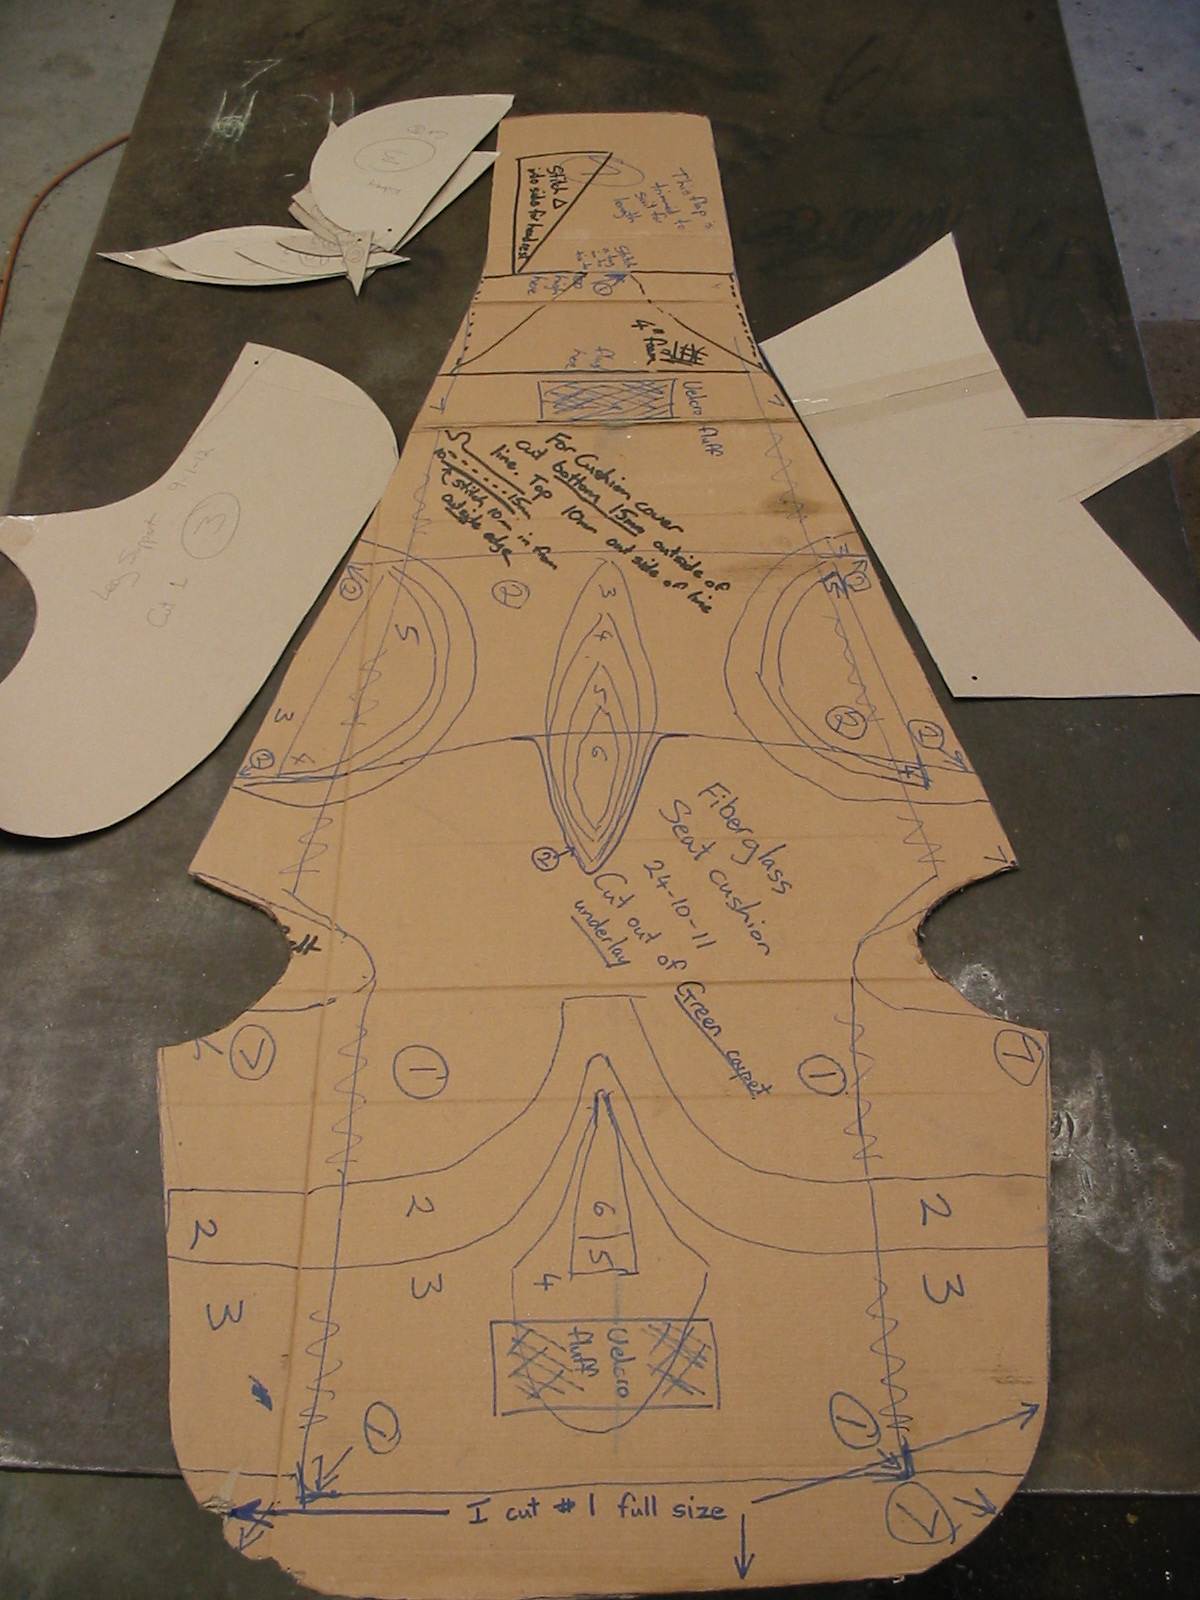
I started out by roughly cutting out a base sheet from the underlay (with sealed surface down), which matches the seat area and flopping it into the seat and roughly trimming it to shape. Don't waste too much time here as the final shape will change so just make sure it's oversize. Cut-outs for the seat belt and wedges taken out, so the foam follows the contours of the seat and doesn't pucker up.
I then cut out the smaller pieces to get the surface contours going. These raised or built up areas are for lumbar, kidney and upper thigh support.
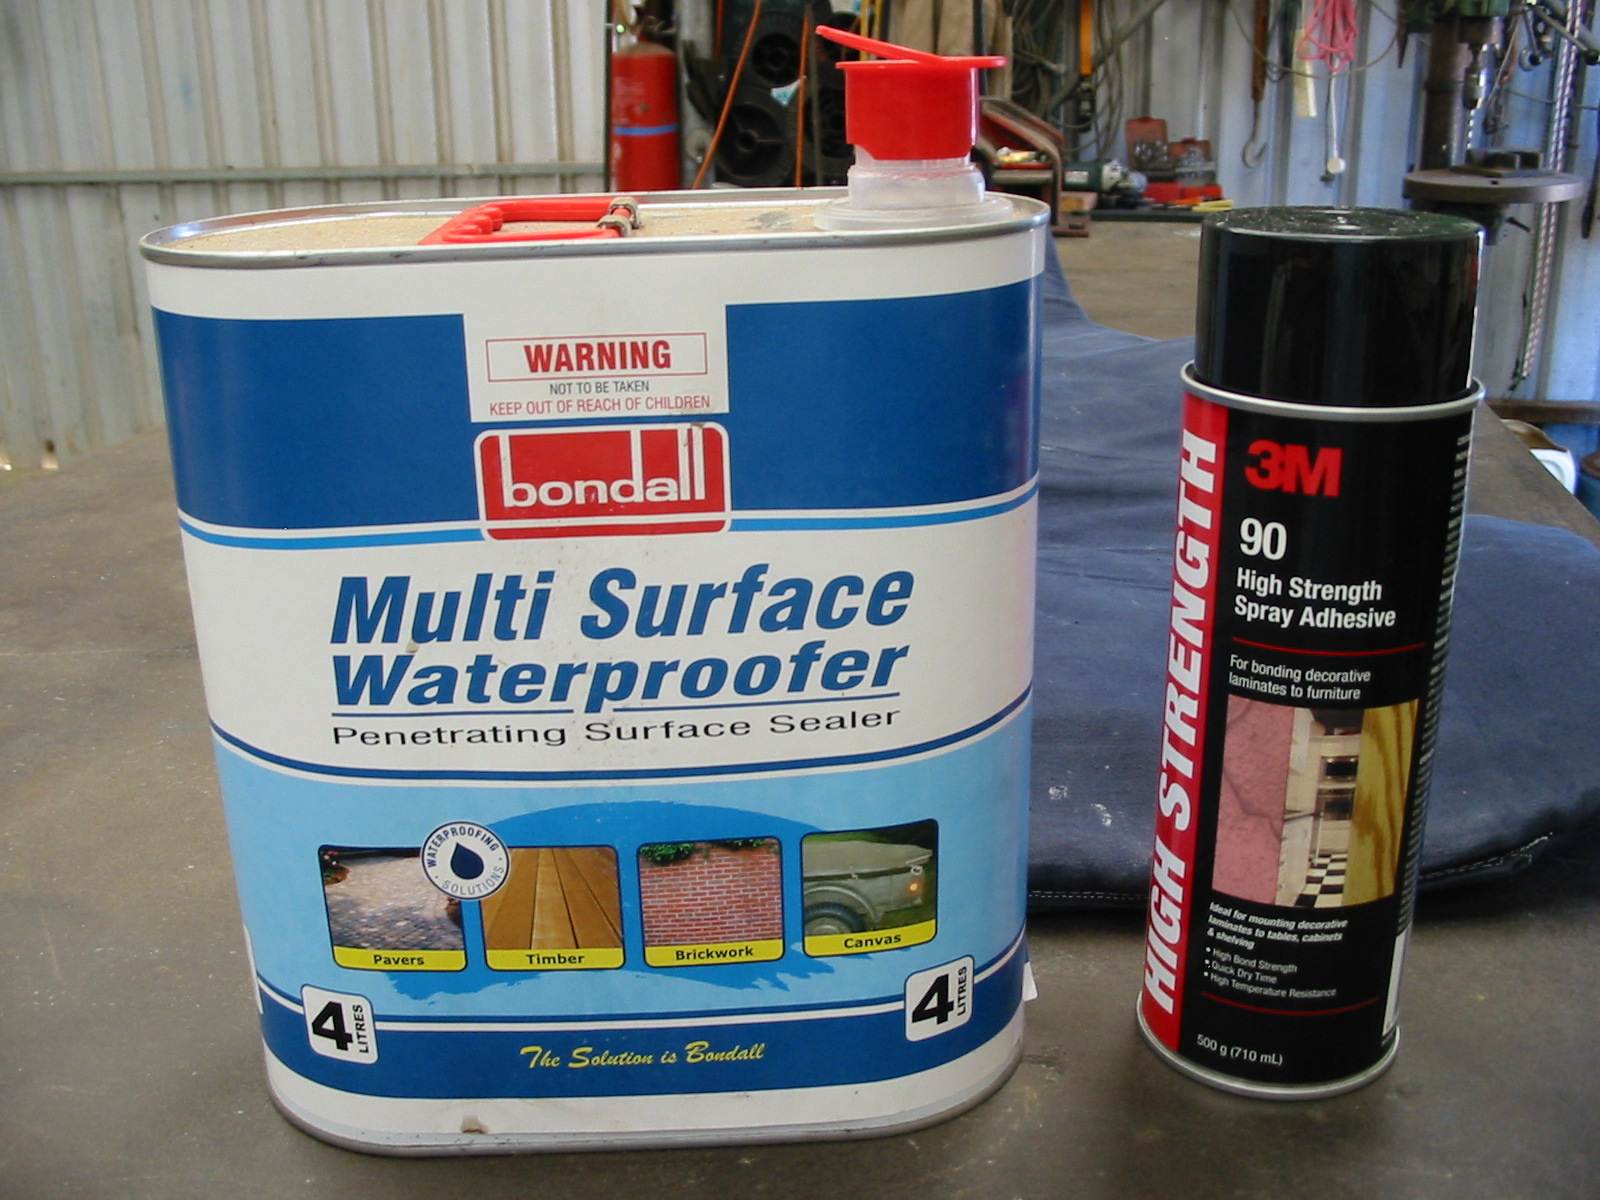
I use spray contact glue to assemble these individual raised areas but
do not stick these components to the base sheet until you are perfectly happy with the position of them.
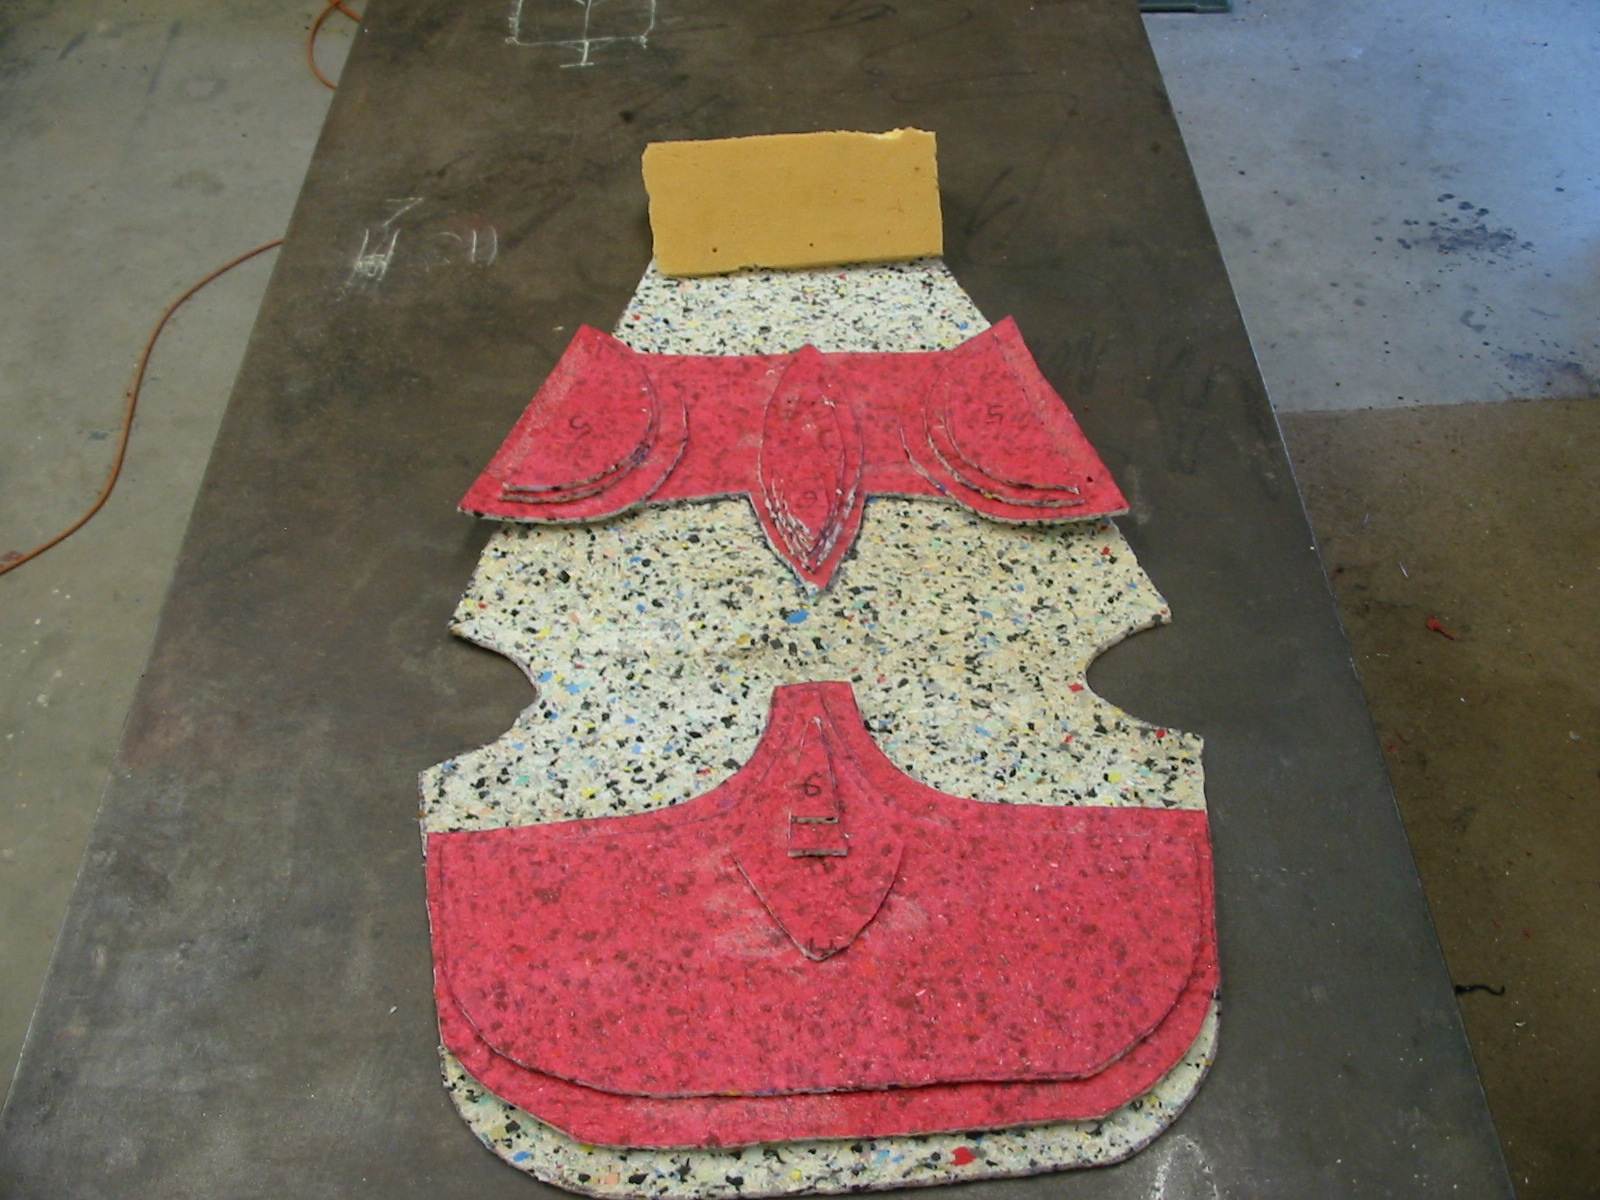
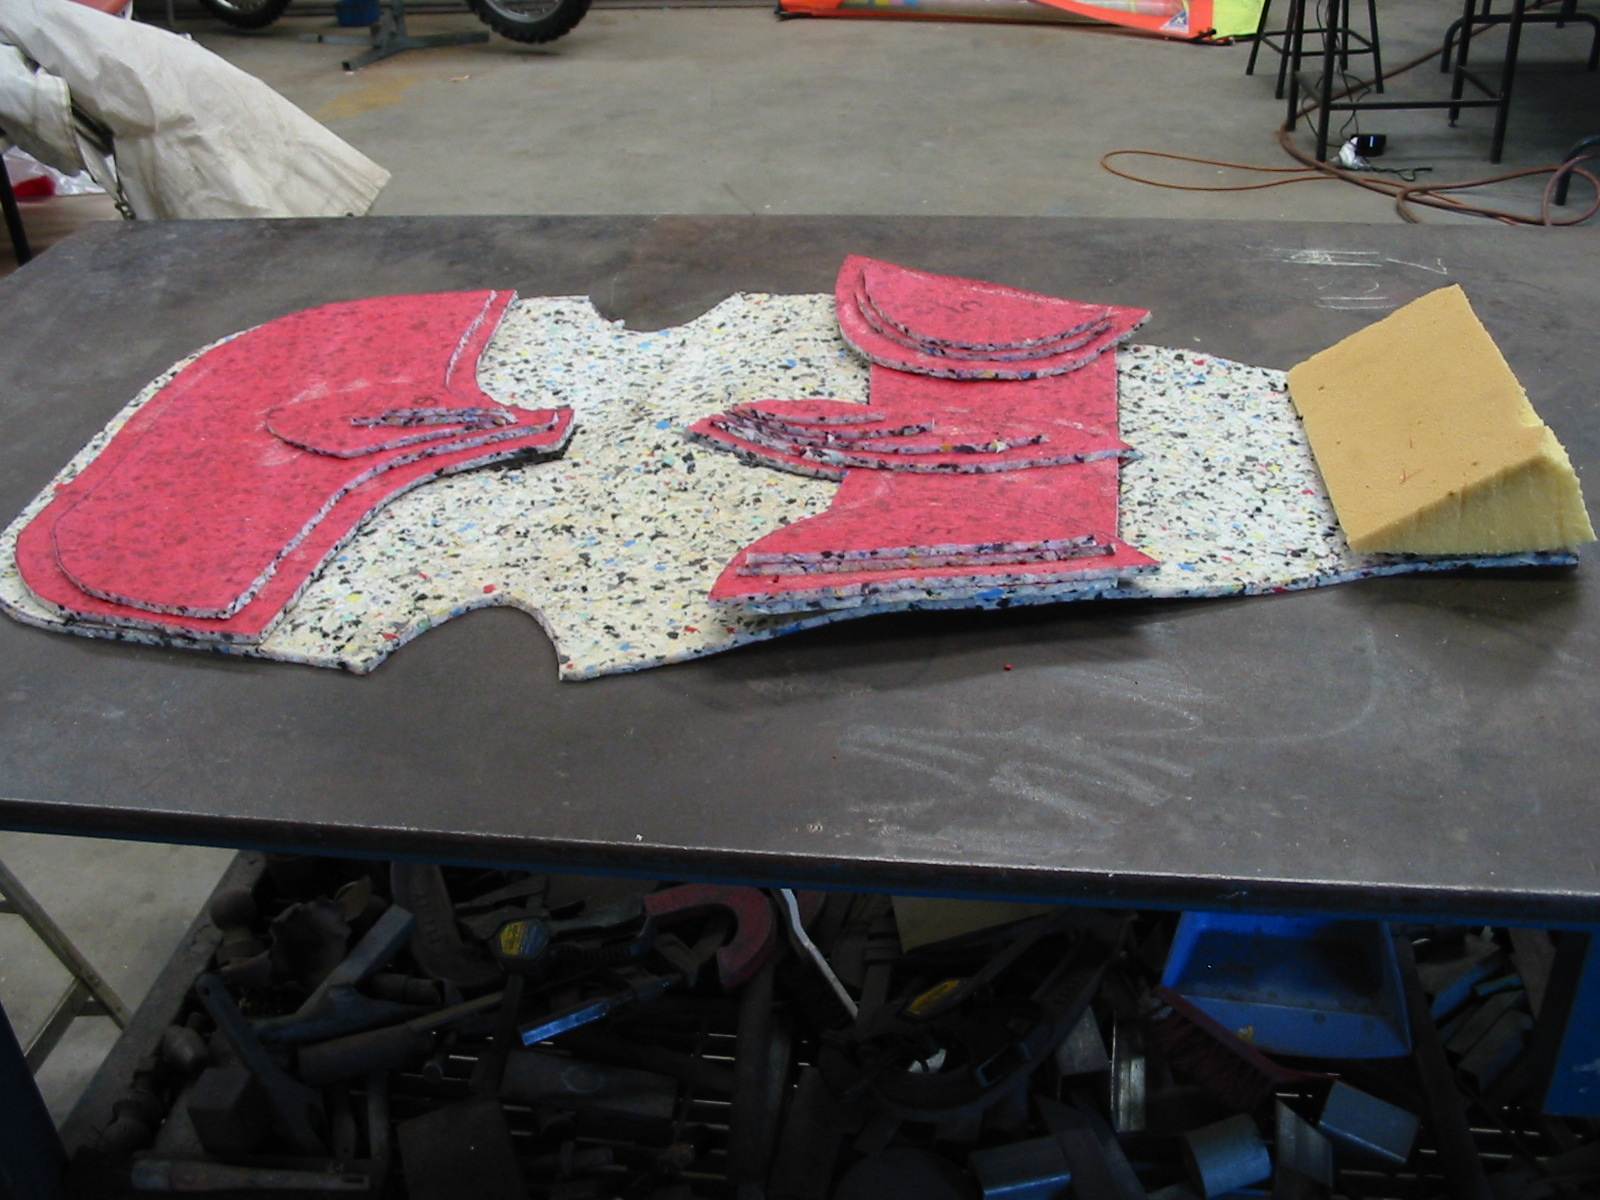
I lay a top sheep of foam over the lot that is cut 15mm smaller all round to complete the foam sandwich. Don't glue this top sheet on yet.
I then lie in the yacht and read a book for some time and fiddle around till I get them just right. Sometimes this means scrapping parts or increasing height/layers of supports, or positions etc.
After you are happy with the height and position of these raised areas they are then glued onto the base sheet (sealed side down) with the 90 contact. Refit the seat into the yacht. The top sheet (With sealed surface up) is then sprayed and placed over the lot and lie on it to get it to conform to it's final shape. There is no going back from here as with this glue its final.
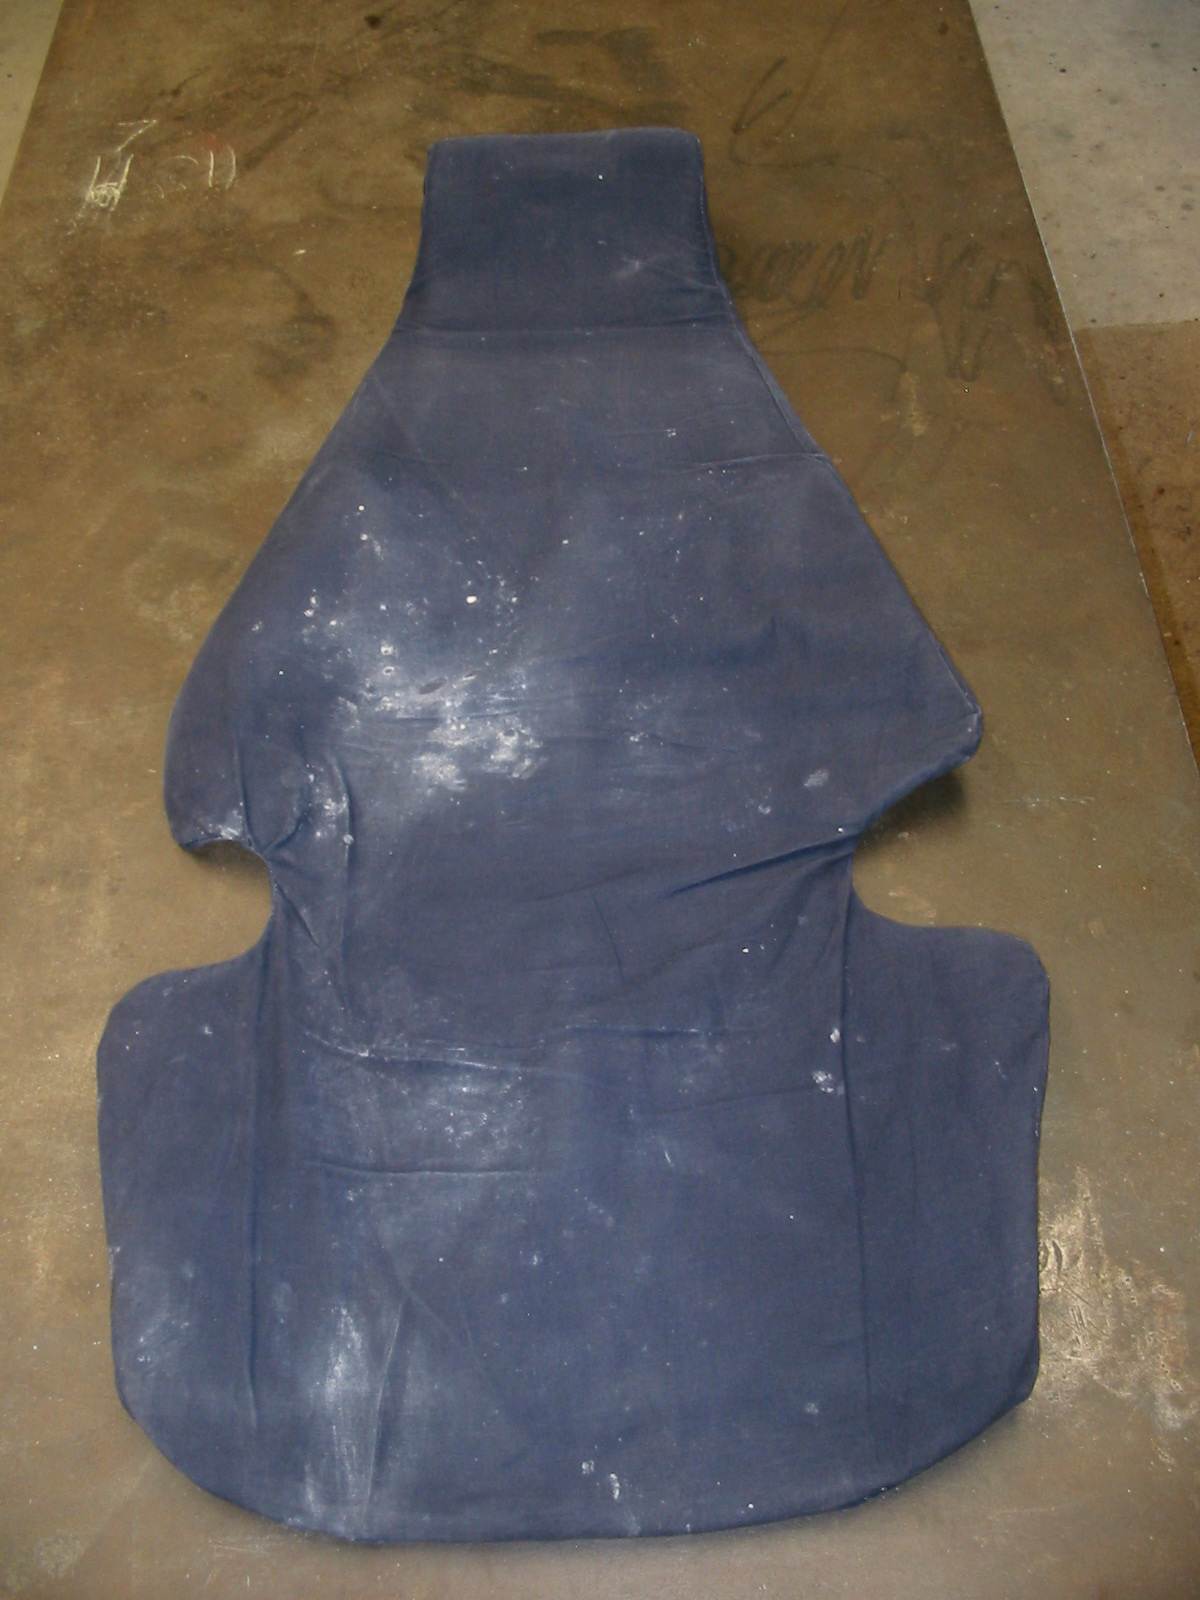
The seat cover is just heavy cotton that is cut 15mm outside the base sheets outline and the top is only 5mm outside the base sheet.
It is sewed inside out leaving the bottom open with straight stich. A row of zigzag around the outside of this stops it fraying and then turned back out the right way. Fit the foam cushion and then run a row of straight stich across the bottom to complete it.
Remember some extra allowance for the head rest and extra layers of cotton to strengthen the area where the cover is attached to the yacht with Velcro or cord as necessary. A small triangle of material is added as well for the extra yellow foam. See the side view in the photo.
Make sure the hook side of the Velcro is on the cushion so if the cover is not used for sailing, you are only in contact with the loop areas. (I got it wrong)
This is the glue I used and also the waterproofing product. I gave the cotton 2 coats and the water beads and runs off but where it's trapped will soak through with time.
I have finalized the design now, so I use these templates for more cushions
Chook